ANGELO CUPIDO SAN VALENTINO
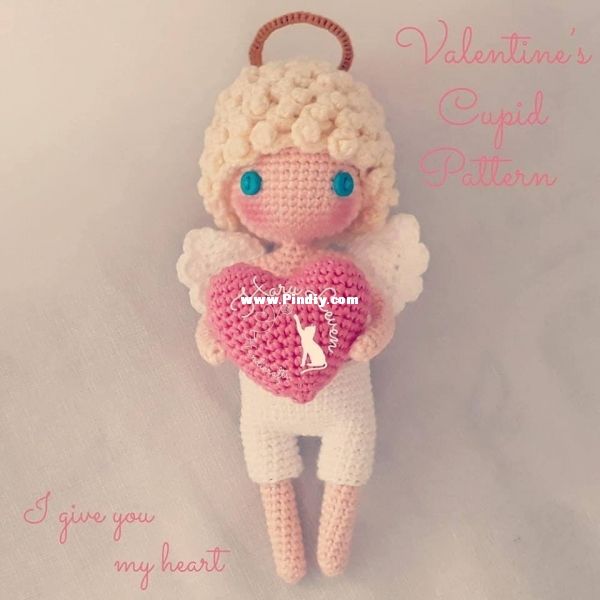
CUPIDO Altezza circa 16 cm (utilizzando i filati e gli uncinetti indicati nella descrizione)
a HARU LEVEN
FILATI E MATERIALE:
filato in cotone nei seguenti colori: (o nei colori che desideri)
colori rosa antico o colore pelle: per viso, busto, gambe e braccia
colore rosa forte: per realizzare il cuore cuore
colore bianco: per corpo ed ali,
colore panna: per capelli,
colore marroncino: per aureola
due bottoncini azzurri da 7 mm
ovatta per imbottire
segnapunti
fard per colorare le guance, oppure un pastello a cera
N.B. per realizzare il cuore ed i capelli usare uncinetto da 2 mm, per le altre parti utilizzare uncinetto da 1,5 mm
ABBREVIAZIONI
AM – anello magico
mb – maglia bassa
aum – aumento
dim – diminuzione
mma – mezza maglia alta
ma – maglia alta
maa – maglia altissima
ESECUZIONE
BRACCIA (farne due) filato nel colore pelle (uncinetto 1,5 mm) nota: le braccia non vanno riempite (se lo desideri puoi inserire del filo di ferro sottile all’interno delle braccia)
1 giro: in un anello magico lavora 6 mb (6)
dal 2° giro al 18° giro lavora 6 mb (6)
chiudere con 1 mbss, fissare filo, tagliare filo.
PRIMA GAMBA filato nel colore pelle (uncinetto 1,5 mm) nota: le gambe vanno riempite man mano che procedi con il lavoro
1 giro: in un anello magico lavora 9 mb (9)
dal 2° giro al 20° giro lavora 9 mb (9)
chiudere con 1 mbss, fissare filo e tagliare.
SECONDA GAMBA filato nel colore pelle (uncinetto 1,5 mm)
1 giro: in un anello magico lavora 9 mb (9)
dal 2° giro al 20° giro lavora 9 mb (9)
ora non tagliare il filo, proseguire andando ad unire le due gambe per il corpo, come di seguito descritto:
21 giro: prosegui con la seconda gamba, avvia 9 catenelle, unisciti alla prima gamba e lavora 9 mb sulla prima gamba, 9 mb nelle 9 catenelle, 9 mb intorno alla seconda gamba, 9 mb dall’altra parte delle 9 catenelle – 36 MB
abbiamo unito le due gambe, ora continua a lavorare proseguire il lavoro
dal 22° giro al 31° giro lavorare 36 mb – 36 MB
32 giro (4 mb, 1 dim) ripetere la parentesi 6 volte – 30 MB
dal 33° giro a 35° giro lavora 30 mb (30)
continua a riempire bene, continua a farlo man mano che procedi con il lavoro
36 giro (3 mb, 1 dim) x 6 (24)
37 giro lavora 24 mb (24)
38 giro lavora 24 mb (24)
ora uniremo le braccia al corpo, fai attenzione di trovarti nella giusta posizione quando lavorerai il 39° giro insieme alle braccia (volendo le braccia piu’ unirle dopo alla fine, con ago e filo, io personalmente preferisco unirle a lavoro ultimato)
39 giro 4 mb sul corpo, 6 mb insieme al primo braccio, 12 mb sul corpo, 6 mb insieme al secondo braccio, 8 mb sul corpo (36)
ricordati di continuare a riempire, sopra tutto riempire bene tra collo e testa, (si consiglia di inserire un filo di ferro tra collo e corpo, aiuta a tenere ancora piu’ stabile la testa, nota: avvolgere del nastro isolante intorno al filo di ferro, servira’ a renderlo piu’ sicuro)
40 giro (4 mb, 1 dim) x 6 (30)
41 giro 3 mb, 1 dim, ripetere 6 volte – 24 MB
42 giro 2 mb, 1 dim, ripetere 6 volte – 18 MB
43 giro 1 mb, 1 dim, ripetere 6 volte – 12 MB
44 giro 1 mb, 1 dim, ripetere 4 volte – 8 MB
45 giro lavorare 8 mb – 8 MB
46 giro 8 aumenti – 16 MB
47 giro 1 mb, 1 aum, ripetere 8 volte – 24 MB
48 giro 2 mb, 1 aum, ripetere 8 volte – 32 MB
49 giro 3 mb, 1 aum, ripetere 8 volte – 40 MB
50 giro 4 mb, 1 aum, ripetere 8 volte – 48 MB
dal 51° giro al 62° giro lavora 48 mb (48)
cucire gli occhi tra il giro 54 e 56, con 9 maglie di distanza tra loro (ma puoi farlo anche dopo aver terminato la testa)
63 giro 6 mb, 1 dim, ripetere 6 volte – 42 MB
64 giro 5 mb, 1 dim, ripetere 6 volte – 36 MB
65 giro 4 mb, 1 dim, ripetere 6 volte – 30 MB
66 giro 3 mb, 1 dim, ripetere 6 volte – 24 MB
continua a riempire fortemente la testa
67 giro 2 mb, 1 dim, ripetere 6 volte – 18 MB
68 giro 1 mb, 1 dim, ripetere 6 volte – 12 MB
69 giro 6 dim., – 6 MB chiudere con 1 mbss
fissare filo e chiudere…
PANTALONCINI (uncinetto 1,5 mm colore bianco)
GAMBA N. 1
1 giro 14 catenelle, chiudere con 1 mbss nella prima cat.
proseguire lavorando a giri continui
2 giro al 4 giro, 1 catenella, 1 mb in ogni punto, chiudere con 1 mbss nella prima m. – 14 MB
fissare filo..
GAMBA N. 2
1 giro al 4 giro fare uguale come sora, alla fine del 4° giro non tagliare il filo, proseguire unendo le due gambe come di seguito descritto:
5 giro prosegui con la seconda gamba: avvia 5 catenelle, unisciti alla prima gamba e lavora 14 mb
intorno, 5 mb nelle 5 cat, 14 mb intorno alla seconda gamba, 5 mb nelle 5 cat, – 38 MB
6 giro al 16 giro lavorare 38 mb – 38 MB
finire con 2 mbss, fissare e tagliare…
Inserire i pantaloncini sul corpo.
CAPELLI (uncinetto 2 mm, colore giallo o a scelta)
1 giro in un anello magico lavora 6 mb – 6 MB
2 giro 6 aumenti – 12 MB
3 giro 1 mb, 1 aum, ripeti 6 volte – 18 MB
4 giro 2 mb, 1 aum, ripeti 6 volte – 24 MB
5 giro 3 mb, 1 aum, ripeti 6 volte – 30 MB
6 giro 4 mb, 1 aum, ripeti 6 volte – 36 MB
7 giro 5 mb, 1 aum, ripeti 6 volte – 42 MB
8 giro 6 mb, 1 aum, ripeti 6 volte – 48 MB
9 giro al 18 giro lavorare 48 mb – 48 MB
finire con 2 mbss, tagliare filo…
RICCIOLI CAPELLI
n.b. se avete dubbi per i riccioli guardate lo schema originale
andate a riprendere i capelli che abbiamo realizzato, mettetelo sotto sopra e agganciamoci (nella maglia posteriore, avviamo 5 catenelle, 3 mb nella seconda catenella, 3 mb nella terza cat, 1 mbss sui capelli), ripeti la parentesi fino alla fine del giro
2 giro salta un giro dei capelli e inizia a fare i riccioli nella prossimo giro, fino alla fine. Ricordati di lavorare i riccioli nella maglia posteriore.
Lavora come sopra, fino a riempire tutti i capelli..
Alla fine, dopo aver lavorato tutti i ricci, cucire i capelli sulla testa con punti ben nascosti.
CUORE uncinetto 2 mm filato rosa
prima parte
1 giro anello magico 6 punti bassi – 6 MB
2 giro 1 aumento in ogni punto – 12 MB
3 giro 1 mb, 1 aum, ripeti 6 volte – 18 MB
4 giro lavorare 18 mb – 18 MB
fissare filo
parte seconda
lavorare come sopra fino al 4 giro, terminato non chiudere uniamo l’altra parte del cuore cosi facendo
5 giro inserire l’uncinetto nella prima parte che abbiamo gia realizzato lavorare 18 mb, ed altre 18 nell’altra parte abbiamo ottenuto 36 mb – 36 MB
n.b. il foro verra chiuso alla fine con ago e filo
6 giro al 7 giro lavorare 36 mb – 36 MB
8 giro 4 mb, 1dim, ripeti 6 volte – 30 MB
9 giro al 10 giro lavorare 30 mb – 30 MB
11 giro 3 mb, 1 dim, ripeti 6 volte – 24 MB
12 giro al 13 giro lavorare 24 mb – 24 MB
iniziare ad imbottire
14 giro 2 mb, 1 dim, ripeti 6 volte 18 MB
15 giro 1 mb, 1 dim, ripeti 6 volte 12 MB
17 giro 6 diminuzioni – 6 MB
fissare filo e tagliare…
Chiudi la parte del foro centrale, poi passa il filo attraverso esso, fino a raggiungere la mano, in modo da poterlo cucire insieme, fallo entrambi le mani e passa il filo nuovamente tra il cuore cosi facendo hai unito il core tra le due mani…
ALI X 2 colore bianco uncinetto 1,5 mm
1 giro: in un anello magico lavora ( 3 mb, 3 mma, 3 ma, 3 mezze maglie alte, 3 maglie altissime) chiudere anello (15) 3 cat, girare
2 giro 3 ma, 3 maglie altissime, 3 ma, 3 mezze maglie, 3 mb, (15) 1 cat e girare
3 giro lavorare 15 mb – (15) 1 cat e girare
4 giro: 1 mbss (4 ma nella stessa maglia, 1 mbss nella maglia successiva) ripeti 7 volte – 15 M
fissare filo, cucire ali al corpo…
AUREOLA uncinetto 1,5 mm filo dorato
filo di ferro
fai un nodo vicino al filo di ferro e lavora tante maglie basse per realizzare cerchietto, chiudere con una
maglia bassissima tutto intorno, chiudere lasciando filo lungo e cucire aureola ai capelli…
~ I give you my heart ~ Valentine’s Cupid (Free Pattern)
https://haruleven.blob.core.windows.net/aspierations/ValentinesCupidFreePattern.pdf
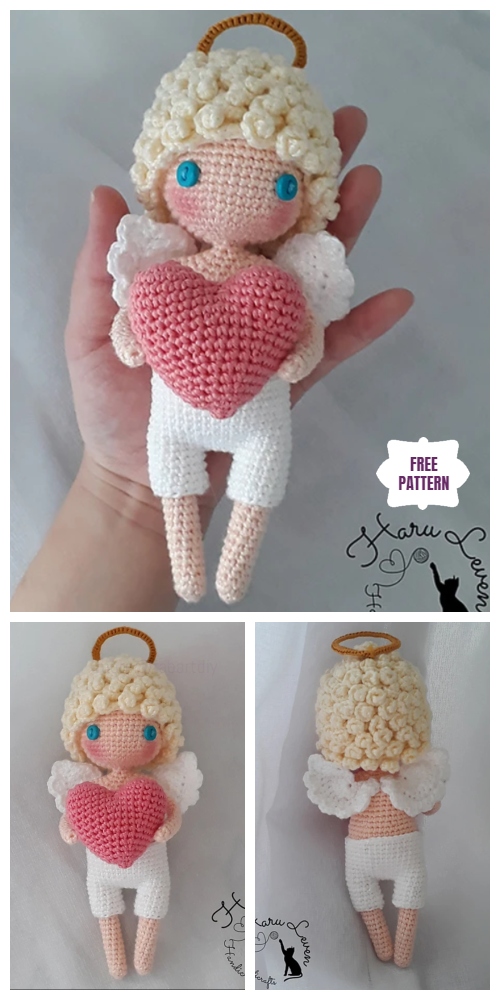
Materials:
* 1.5mm crochet hook and adequate yarn for this hook size in the colours peach, white and golden, or your choice of colour for the skin, the wings, the shorts and the halo
* 2mm crochet hook and adequate yarn for this hook size in the colours yellow and pink or your choice of colour for the hair and the heart
* 7mm safety eyes or buttons
* Scissors
* Tapestry needle
* Stuffing fibre
* Handicraft wire
* Blush makeup
Yarn information:
For this project, I used cotton yarn Bella (Fios Pingouin, TEX 370, 5ply, 12WPI) with a 2mm crochet hook and cotton yarn Anne (Círculo Produtos, TEX 295, Ne 4/2, 2ply, 14WPI) with a 1.5mm crochet hook.
Size:
Approximately 16cm. The actual size of the finished item may change depending on the materials used. If you use different sizes of hook and yarn, make sure you adapt the size of the eyes too.
My abbreviations (based on US terms):
* MR – magic ring
* ST – stitch
* CH – chain
* SL ST – slip stitch
* SC – single crochet
* INC – increase (2sc in the same st)
* DEC – decrease (sc 2 together)
* HDC – half double crochet
* DC – double crochet
* HTR – half treble crochet
* TR – treble crochet
* (STITCH)xNUMBER – number of times you have to repeat that stitch
* [ ] – total number of stitches
Tips:
* If you don’t know how to do one of the crochet stitches used in this pattern you can search on YouTube for “name of the stitch + tutorials” and you’ll find some very easy and detailed video tutorials for beginners.
* The rows that don’t mention to do a chain between them are worked in continuous rounds, so it’ll be easier if you use a stitch marker to mark every last stitch from the row.
PATTERN
Arms: make 2 (1.5mm crochet hook / skin colour yarn)
R1: 6sc in the MR [6]
R2-R18 (17 rows): 1sc in each st around [6]
Fasten off. There’s no need to stuff the arms. Insert some handicraft wire in it.
Leg 1: (1.5mm crochet hook / skin colour yarn)
R1: 9sc in the MR [9]
R2-R20 (19 rows): 1sc in each st around [9]
Stuff and fasten off.
Leg 2: (1.5mm crochet hook / skin colour yarn)
R1: 9sc in the MR [9]
R2-R20 (19 rows): 1sc in each st around [9]
R21: ch9, join to the first leg with 9sc around it, 9sc into the ch9, 9sc around the second leg, 9sc into the other side of the ch9 [36]
Stuff the leg and do not fasten off. Mark the last st with a stitch marker and continue making the body from here.
Body and Head: (1.5mm crochet hook / skin colour yarn)
R22-R31 (10 rows): 1sc in each st around [36]
R32: (4sc, dec)x6 [30]
R33-R35 (3 rows): 1sc in each st around [30]
R36: (3sc, dec)x6 [24]
R37-R38 (2 rows): 1sc in each st around [24]
R39: 4sc, join the first arm with 6sc around it, 12sc, 6sc around the second arm, 8sc [36]
R40: (4sc, dec)x6 [30]
Start stuffing the body. You can also insert a piece of handicraft wire in it if you want, so the neck will stand firmly.
R41: (3sc, dec)x6 [24]
R42: (2sc, dec)x6 [18]
R43: (sc, dec)x6 [12]
R44: (sc, dec)x4 [8]
R45: 1sc in each st around [8]
R46: (inc)x8 [16]
R47: (sc, inc)x8 [24]
R48: (2sc, inc)x8 [32]
R49: (3sc, inc)x8 [40]
R50: (4sc, inc)x8 [48]
R51-R62 (12 rows): 1sc in each st around [48]
Insert the eyes at R54, 9 st apart.
R63: (6sc, dec)x6 [42]
R64: (5sc, dec)x6 [36]
R65: (4sc, dec)x6 [30]
R66: (3sc, dec)x6 [24]
Stuff the head.
R67: (2sc, dec)x6 [18]
R68: (sc, dec)x6 [12]
R69: (dec)x6 [6]
Fasten off, close the hole and hide the rest of the thread inside the head. Apply some blush makeup onto the cheeks.
Shorts: (1.5mm crochet hook / white yarn or your choice of colour)
LEG 1
R1: ch14, sl st in the first ch
R2-R4 (3 rows): ch1, 1sc in each st around, sl st in the first st [14]
Fasten off.
LEG 2
R1-R4: do the same as Leg 1, but do not fasten off
R5: ch5, join to the first leg with 14sc around it, 5sc into the ch5, 14sc around the second leg, 5sc into the ch5 [38]
R7-R16 (10 rows): 1sc in each st around [38]
Finish with 2sl st, fasten off and weave the end.
Hair: (2mm crochet hook / yellow yarn or your choice of colour)
CAP
R1: 6sc in the MR [6]
R2: (inc)x6 [12]
R3: (sc, inc)x6 [18]
R4: (2sc, inc)x6 [24]
R5: (3sc, inc)x6 [30]
R6: (4sc, inc)x6 [36]
R7: (5sc, inc)x6 [42]
R8: (6sc, inc)x6 [48]
R9-R18 (10 rows): 1sc in each st around [48]
Finish with 2sl st, fasten off and weave the end.
CURLY HAIR
R1: Insert the hook between two stitches of the last row on the cap, like if you were going to do a front post stitch. Ch5, 3sc in the second st from hook and in the next 3st. Sl st in the next 2st of the row from the cap. Repeat until the end of this row.
R2: Do sl st into 2st going up to the next 2 rows from the cap. By doing that, you’ll skip a row and start to do the curls in the next one. Continue making ch5, 3sc in each st next, 2sl st on the row from the cap.
Repeat R2 until filling the whole cap with curls.
Fasten off. You can sew or glue the hair in the head if you want.
Heart: (2mm crochet hook / pink yarn or your choice of colour)
PART 1
R1: 6sc in the MR [6]
R2: (inc)x6 [12]
R3: (sc, inc)x6 [18]
R4: 1sc in each st around [18]
Fasten off.
PART 2
R1-R4: do the same as part 1, but do not fasten off and insert a stitch marker in the last st.
R5: Insert the hook into the st next to the last you did in part 1. Do 18sc around it and insert the hook into the st next to the first st attached to the part 1 (next to the stitch marker) and do another 18sc around it. It’ll create a hole in the middle, which we’ll have to sew in the end to close it. The last st you must do it’s the one with the stitch marker on it. [36]
R6-R7 (2 rows): 1sc in each st around [36]
R8: (4sc, dec)x6 [30]
R9-R10 (2 rows): 1sc in each st around [30]
R11: (3sc, dec)x6 [24]
R12-R13 (2 rows): 1sc in each st around [24]
Start stuffing.
R14: (2sc, dec)x6 [18]
R15: 1sc in each st around [18]
R16: (sc, dec)x6 [12]
R17: (dec)x6 [6]
Fasten off leaving a long tail.
Close this hole made at the end of the heart, then pass the thread through it until it reaches the hand, so you can sew it together. Do it for both hands and pass the thread through the heart again to sew that first hole made in the beginning from joining the 2 parts. Hide the thread inside the heart and fasten off.
Wings: make 2 (1.5mm crochet hook / white yarn or your choice of colour)
R1: 3sc, 3hdc, 3dc, 3htr, 3tr inside the MR, close the ring [15]
R2: ch3 and turn, 3tr, 3htr, 3dc, 3hdc, 3sc [15]
R3: ch1 and turn, 1sc in each st around [15]
R4: ch1 and turn, sl st, (4dc in the same st, sl st in the next st)x7 [15]
Fasten off and leave a long tail. Use this tail to sew the wings in the body.
Halo: (1.5mm crochet hook / golden yarn or your choice of colour)
Make a knot with the golden thread in a piece of handicraft wire. Then start to make single crochets thru the wire until you reach the desired size for the halo, and sl st in the first st. Attach the halo into the hair using the wire you still have left.